
Introduction and initial setup of embedded ethernet
1) Introduction
Ethernet is the protocol used to communicate between all the components. It uses the auto-generated Ethernet driver code from cubeMX to use the physical Ethernet peripheral. It also uses LWIP to do the lowest levels of packet handling. Lastly, we use freeRTOS for multi threading. The current implementation cannot work without it.
2) CubeMX
CubeMX is used to automatically generate setup code for the stm32. To use Ethernet you have to set up a few things in cubeMX.
To write this driver I mostly used videos from ControllersTech on YouTube. The most useful video is STM32 Ethernet (Part 1): How to configure Ethernet peripheral and perform successful ping test [1]. So if you do not understand anything, watch that video.
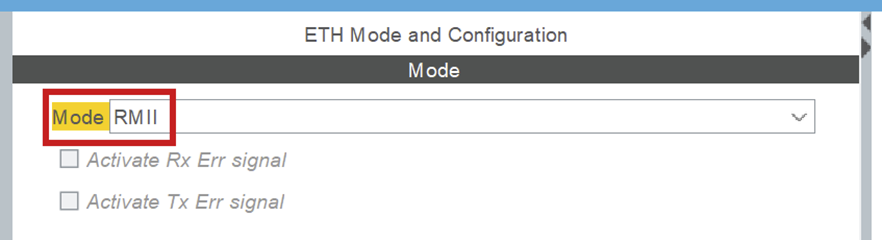
a. ETH
ETH is under connectivity in cubeMX. It sets up the Ethernet peripheral. Set it to RMII mode.
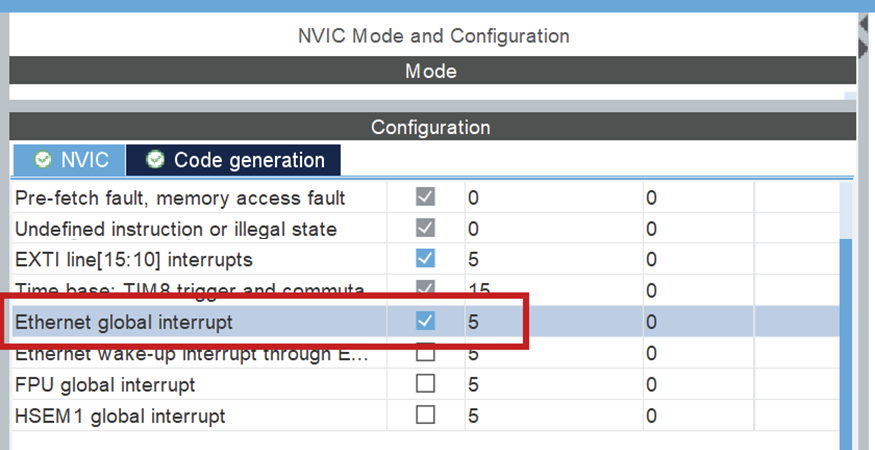
NVIC > NVIC
Turn on Ethernet global interrupt in NVIC settings.
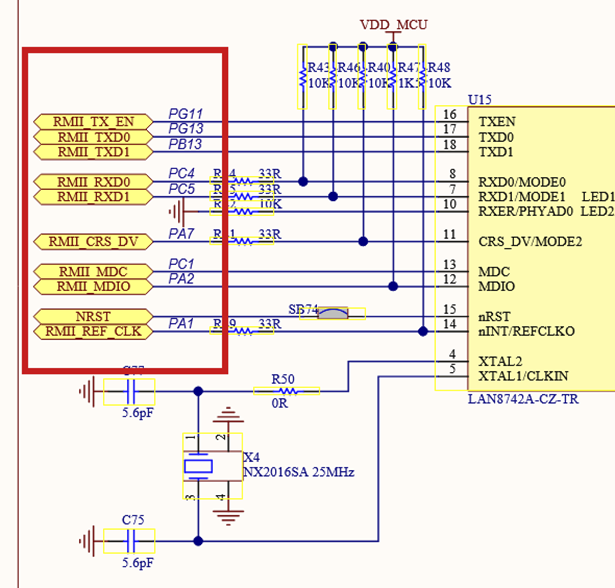
ETH > GPIO settings
When Ethernet is enabled, the pins should automatically be configured according to the below schematic. This can be wrong, please confirm it!
Setup all the PINS like it is done in the PIN schematic (Download: MB1364-H753ZI-C01 Board schematic, pg. 6) [2].
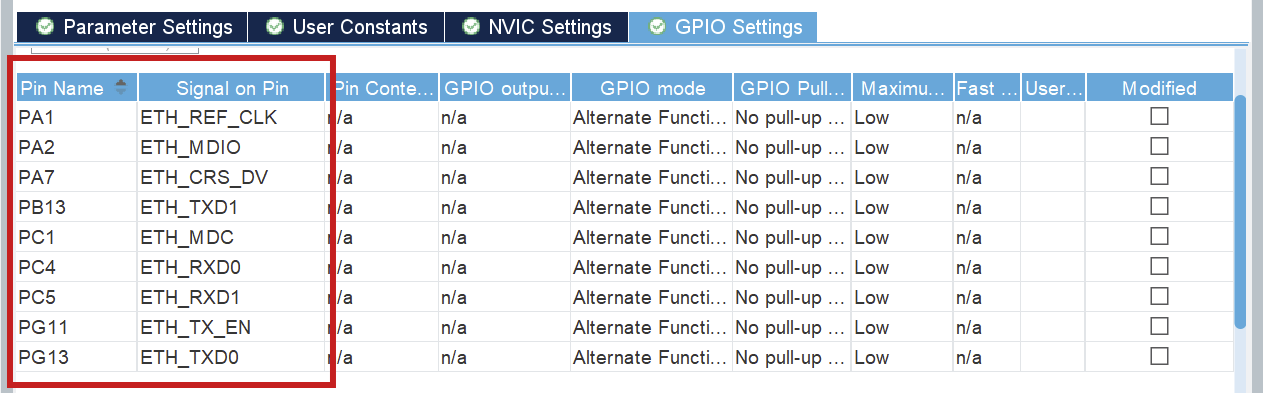
Troubleshooting: Pins not set as schematic
If any of the pins are not as in the schematic, refer to the above information. You can click each pin in CubeMX and choose the correct function (e.g. ETH_RXD0), the other (incorrect) pin will be automatically disabled.
b. LWIP
LWIP is a middleware generated by cubeMX. You can find it under middleware.
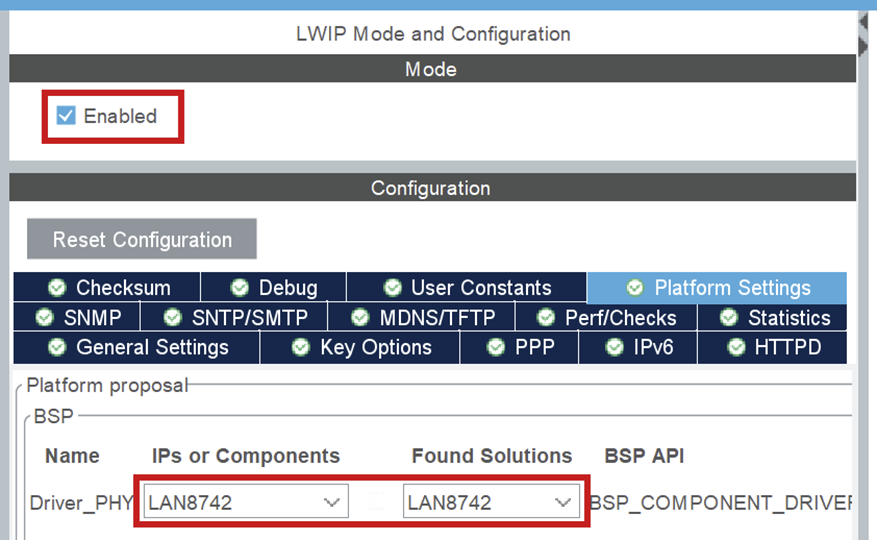
LWIP > Platform Settings
Set up LAN8742, to signal that that is the physical Ethernet driver you use.
LWIP > General settings
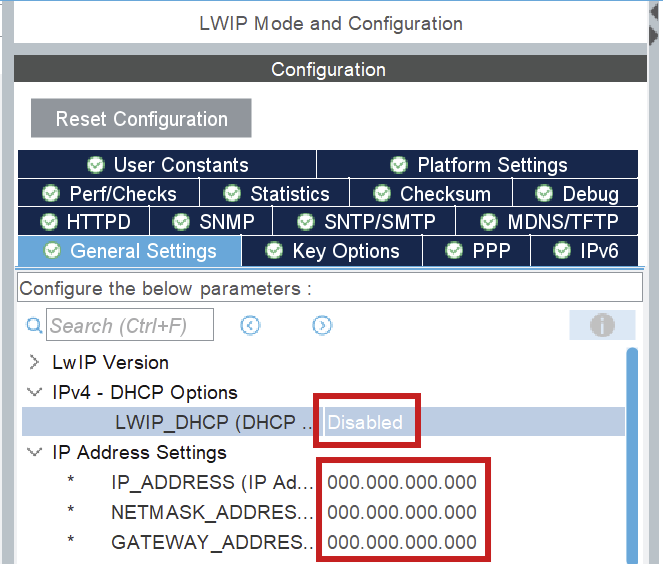
The most important configurations here are the DHCP (DHCP = Disabled) and IP address settings.
The IP address settings don't matter, they will be overwritten in a configuration file in the code.
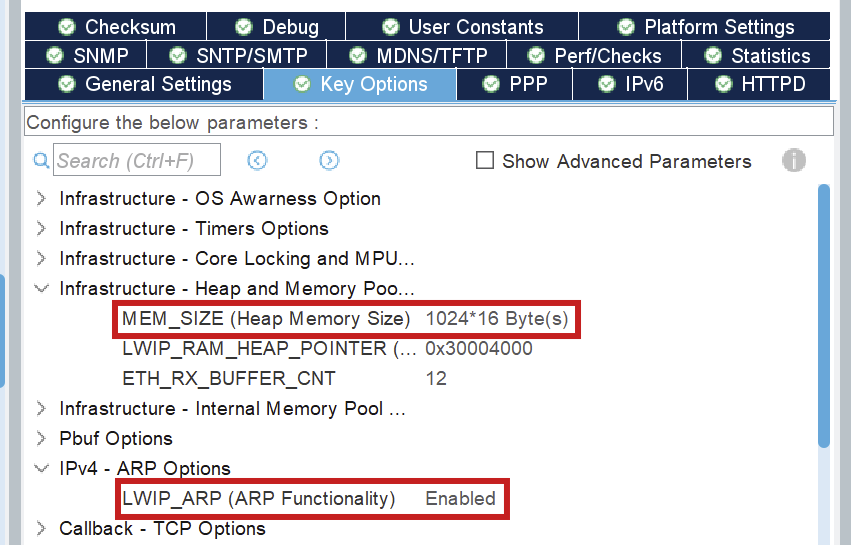
LWIP > Key options
The most important part of the tab Key options is to check if LWIP_ARP = Enabled. You also need to keep track of the MEM_SIZE (Heap Memory Size). Start with a value of 1024*16 bytes. That is the value I use, but it can be changed if need be.
c. CORTEX_M7
You can find CORTEX_M7 under System Core.
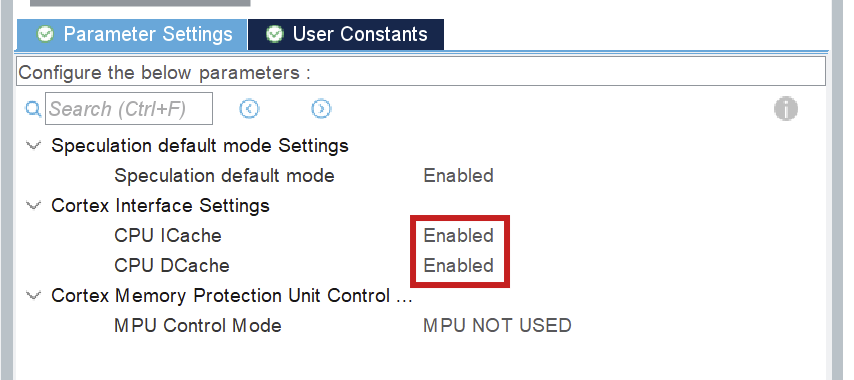
CORTEX_M7 > Parameter Settings
Turn on CPU ICache and CPU DCache.
Setup memory protection like seen below:
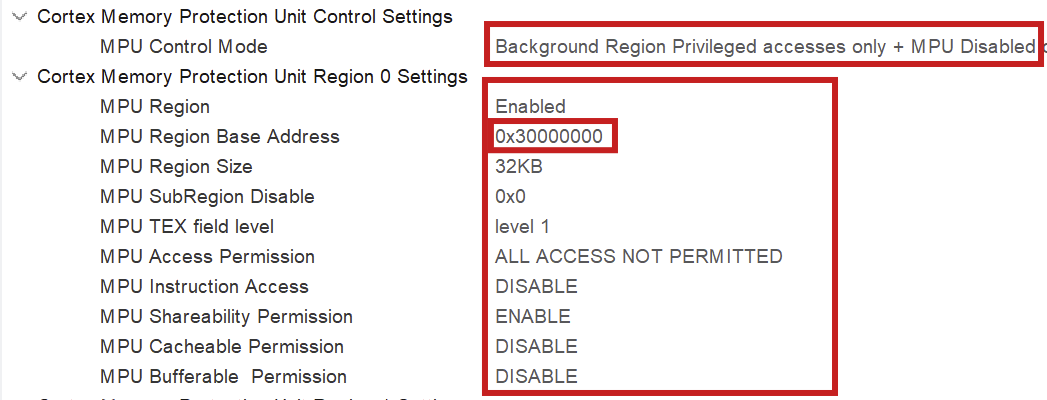
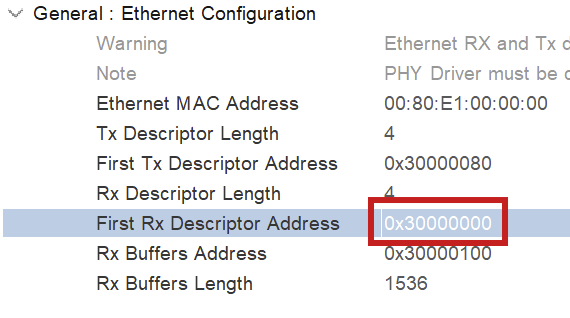
The MPU Region Base Address is the address of the first Rx descriptor (ETH > Parameter Settings > General). The MPU region size is calculated using heap memory size and the RX buffers. Watch the video [1] mentioned above for more information.
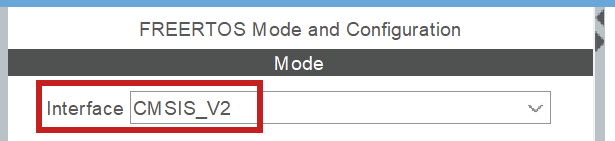
d. FreeRTOS
Freertos is automatically integrated in LWIP if you turn it on in cubeMX. It does not have to be modified, it just has to be turned on. Make sure you use CMSIS_V2, because V1 did not work well.
NOTE: when you use FreeRTOS, you will have to select another SYS Timebase Source. Go to SYS > Timebase Source and select any of the free timers, just make sure it is NOT SysTick. Make sure you do not use that timer for any other activities.
3) The Code
After you generate the code for your board, you can look through networking component, in the ethernet.h file, to see all public Ethernet functions. For a full guide of how to use Ethernet, I refer you to Driver usage [3].