**NOTE:** If you are new to PWM, first take a look at [Example PWM generation](https://bookstack.roboteamtwente.nl/books/robotic-arm/page/example-pwm-generation "Example PWM generation"), it is more in depth
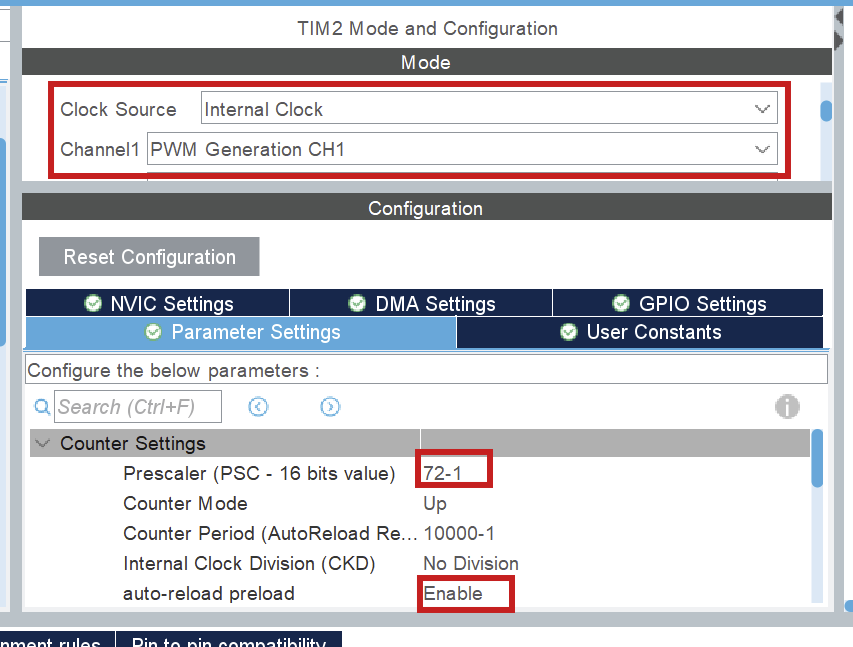**For each stepper**, enable pwm on channel 1. This is done by setting `Clock Source = Internal Clock` and `Channel 1 = PWM Generation CH1`.**NOTE:** Each pwm output for each stepper needs a **separate timer**. Right now, it is hardcoded that **PWM uses Channel 1**, so only use Channel 1!
The following parameters are important: - `prescaler` The **prescaler** has to do with the clock configuration. You want to set the prescaler **equal to the amount of MHz in the clock configuration**, because we will divide the clock frequency by the prescaler! (On the board right now, the clock speeds is set to 72MHz.) This way we work with **1MHz** in calculating the frequency and duty cycle. - `auto-reload preload` I lowkey don't know what this does, just enable it to be safe. ### 2) DMA Now, you have to set up the DMA for the same timer/channel. This is in the `DMA settings` tab. [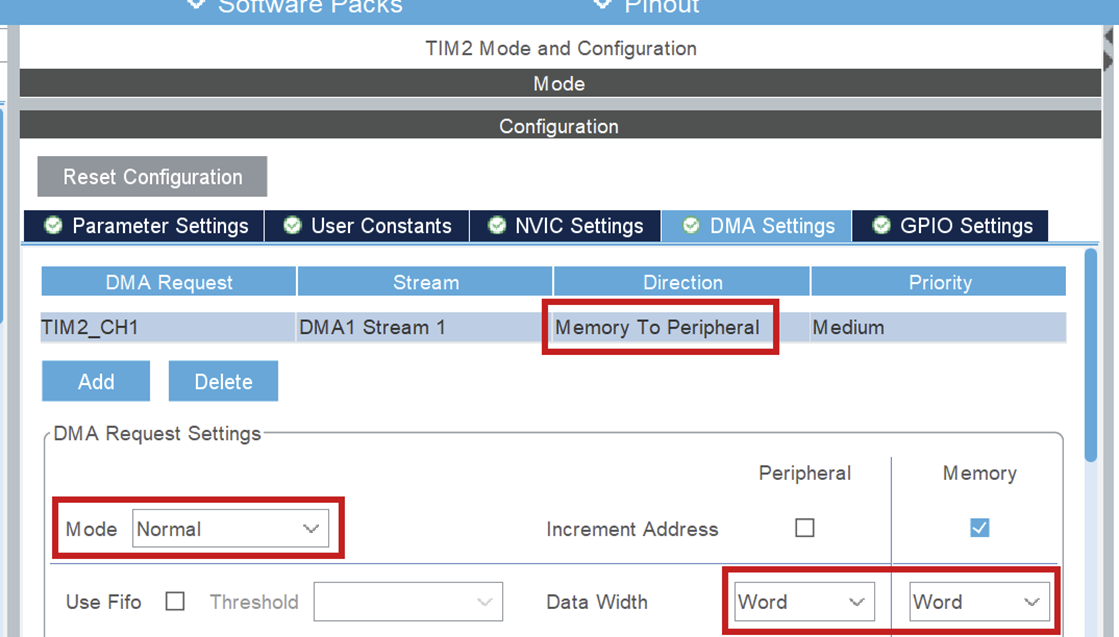](https://bookstack.roboteamtwente.nl/uploads/images/gallery/2026-05/VPKafbeelding.png) Set the following parameters: - `DMA Request = TIMx_CH1` This is the timer and channel which will be using DMA. **Make sure this is on channel 1, as stated above!** - `Stream` This can be any of the available streams. - `Direction = Memory to Peripheral` **Important!** Because we will be using DMA to transfer PWM signals from the code (memory) to the pin (peripheral) it needs to be set this way. - `Priority` This can be set to any level, but note that it is advisable to put **all steppers to the same priority**. I don't know (and am not responsible for) what happens if they are different. - `Mode = Normal` In normal mode, DMA transfers the buffer from memory **ONCE** and then remains at the last sent value (remember this, it is important later). See [resource 1](https://controllerstech.com/pwm-in-stm32/). - `Data width = Word` This is the width of the values we will be sending. Since the values we will be sending are used to fill the CCR register, we will set this to word (uint32\_t size). Half word would be for 16 bit registers. ### 3) GPIO pins Set 2 pins to GPIO\_Output by clicking on them in the CubeMX UI. One of these will be used for the direction pin and another for the enable pin. //TODO: add driver resource ### 4) Clock Configuration For PWM it really doesn't matter at what speed you set the clock. The only thing that matters is that the prescalar is set to the same amount. So if your clock speed is 72, set it to 72-1, if your clock speed is 84, set it to 84-1. --- ## **Code** ### 1) Public Methods ### 2) Private Methods ### 3) Example ## **Resources** 1. [Controllerstech: STM32 PWM Output: Generate PWM Signal with & without DMA](STM32%20PWM%20Output:%20Generate%20PWM%20Signal%20with%20&%20without%20DMA)