This image's official place is [on the drive](https://drive.google.com/drive/folders/1jQs3EzIct_fNm2hewfAxjQsyM8DRpr6w?usp=drive_link). Please keep them up-to-date.
To edit this image, download it from the drive and open it at [https://excalidraw.com](https://excalidraw.com). When exporting, don't forget to toggle the "embed the scene" switch and upload it to the drive.
This picture lists all software running on the rover and how data flows among different programs. #### Communications 99% of our programs are running within the ROS2 framework and use the built-in publish-subscribe system to communicate. For more details, see [this tutorial](https://docs.ros.org/en/humble/Tutorials/Beginner-CLI-Tools/Understanding-ROS2-Topics/Understanding-ROS2-Topics.html "Understanding topics — ROS 2 Documentation"). TL;DR: The programs that have the data publish it to various topics, and other interested programs subscribe to that topic to receive the data. For communications with programs running outside ROS2, we use Ethernet and protobufs. See [Communication system](https://bookstack.roboteamtwente.nl/books/communication-system "Communication system") for details. #### SubsystemsTODO
# Getting Started ## Prerequisites All development happens on [Ubuntu 22.04 (Jammy Jellyfish)](https://releases.ubuntu.com/jammy/). If you are running Windows, the easiest way to install it is [through WSL2](https://learn.microsoft.com/en-us/windows/wsl/install). If you prefer to work in Docker, you can use image `docker.io/osrf/ros:humble-desktop-full`. You need to have a basic understanding of ROS2. Follow [ROS2 tutorials](https://docs.ros.org/en/humble/Tutorials.html) before you continue. ## First time setupSee [README.md](https://github.com/RoboTeamTwente/erc-software-rover/blob/main/README.md) for more up-to-date instructions.
Watch out! NVIDIA “helpfully” keeps packages more up-to-date than stock Ubuntu, so e.g. OpenCV's version will be fresher on Jetson, compared to your development laptop.
```bash ### Download the code git clone https://github.com/RoboTeamTwente/erc-software-rover cd erc-software-rover git submodule update --init --recursive ### Launch ROS2 in Docker (only if you don't have Ubuntu 22.04) #docker run --rm -it -v $PWD:/src -v /tmp/.X11-unix:/tmp/.X11-unix -e DISPLAY osrf/ros:humble-desktop-full #cd /src ### Install dependencies apt update rosdep install -iy --from-path src ### Compile RealSense depth cam driver with custom flags # It is a good time to grab some tea. # Compilation will take about 5 minutes on a reasonably modern laptop, # or about 30 minutes on Jonny Boi. colcon build --packages-select librealsense2 --cmake-args \ -DCHECK_FOR_UPDATES=OFF \ -DFORCE_RSUSB_BACKEND=ON ``` `librealsense2` is built from source to switch it to the `RSUSB` backend. We use this backend because it does not require a kernel patch, unlike the default one. See the [RealSense installation guide](https://github.com/realsenseai/librealsense/blob/9a0dd70db1a2c180b69c6c257cd2ee6120505499/doc/installation_jetson.md) for details. We also disable the update checker, because it fails to build for some reason. ## Common operations ### Compile While working on a package, you'll frequently want to compile it and all its dependencies: ```bash colcon build --packages-up-to=$PACKAGE source install/local_setup.bash ```Don't forget to `cd` to the root of the repo!
`local_setup.bash` doesn't need to be sourced most of the time.
### Run your code There are two different things you can run in ROS2: A node, and a launch file. For more details see [Understanding nodes](https://docs.ros.org/en/humble/Tutorials/Beginner-CLI-Tools/Understanding-ROS2-Nodes/Understanding-ROS2-Nodes.html) and [Launching nodes](https://docs.ros.org/en/humble/Tutorials/Beginner-CLI-Tools/Launching-Multiple-Nodes/Launching-Multiple-Nodes.html). ```bash ros2 run $PACKAGE $EXECUTABLE # -- or -- ros2 launch $PACKAGE $LAUNCH_FILE ``` # Business Logic # Overview Business Logic is encoded in [Behavior Trees](https://arxiv.org/pdf/1709.00084 "Behavior Trees in Robotics and AI: An Introduction") (do check out the link, it's the nicest introduction to BTs there is). We use [BehaviorTree.CPP](https://www.behaviortree.dev/) library for this. All business logic lives in the [rtt\_behavior package](https://github.com/RoboTeamTwente/erc-software-rover/tree/main/src/rtt_behavior). There's a bunch of BTs sketched out in the `docs/business-logic.cts` file ([in the same repo](https://github.com/RoboTeamTwente/erc-software-rover/blob/main/docs/business-logic.cts)). You can open it in [TreeSheets](https://strlen.com/treesheets/).None of this code was ever run in production, just FYI
# Computer Vision # Overview The computer vision subsystem of the rover is utilized in the Navigation, Surface Sampling and Maintenance Tasks of ERC. It is accomplished through the use of the rover cameras: Gripper camera (digital Arducam), Bottom chassis camera (digital Arducam), Front chassis camera (Depth). The subsystem can be further divided in two sections, ArUco Detection and Object detection, both aiding in different parts of the ERC competition. On the RoboWiki, please read the page "ArUco" for understanding ArUco Detection, and "YOLO" for understanding general object detection through the YOLO framework (such as detecting a button on the maintenance board). ### # ArUco ## Architecture and ERC tasks| [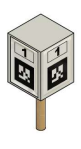](https://bookstack.roboteamtwente.nl/uploads/images/gallery/2026-04/MtXimage.png) ArUco landmark |
For now we use OpenCV version 4.8 and we are forced to build it from source, as you will read below. However, soon this might change to use NVIDIA packages instead, reducing build time by a lot.
The ArUco detection and pose estimation code is placed in the aruco\_track node of the "erc-software-rover" Github repository. The README.md explains how to run this ROS2 node, while the main code implementation is in "src/aruco\_track/src/aruco\_tf2\_node.cpp". The files "CMakeLists.txt" and "package.xml" are responsible for project initialization and dependency installation (as per ROS2 standards; [Please read all ROS2 tutorials](https://bookstack.roboteamtwente.nl/books/jonny-boi/page/overview "Overview")). #### Step 1 - Build OpenCV from source Before doing anything else, make sure to build OpenCV 4.8 from source. We have a bash file that will do that for you in "/assets/install\_deps.sh", so run (needs to run only once, but it will take at least 20 minutes to fully install): ```bash ./src/aruco_track/assets/install_deps.sh ``` However, note that the current implementation depends on OpenCV 4.8 specifically based on the CMakeLists.txt lines: ```c++ find_package(ament_cmake_auto REQUIRED) find_package(OpenCV 4.8 REQUIRED) ``` So, if you will change OpenCV version from anything other than 4.8 in the future, make sure you also change the CMakeLists.txt lines here. #### Step 2 - Run the git submodule update The erc-software-rover git repo utilizes a number of other submodules. Initialize them with this line before proceeding with any other step: ```bash git submodule update --init --recursive ``` #### Step 3 - Run colcon build Now you can properly build the ROS2 node 'aruco\_track': ```bash colcon build --packages-select aruco_track ``` or simply: ``` colcon build ``` #### Step 4 - source the terminal After you run colcon build, you want to source every time before running the node: ```bash ./install/setup.bash ``` #### Step 5 - Run the ROS2 Node ```bash ros2 run aruco_track aruco_tf2_node ``` #### Step 6 - Select Video Source Self explanatory based on the terminal print message: ```bash === ArUco Tracker === Select video source: [ENTER] Use default USB camera (index 0) [0/1/2] Use a different camera index [URL] Use an IP camera / stream URL Examples: http://192.168.0.152:8080/video (IP Webcam) 0 ``` Default value is index 0. This will use the camera connected on '/video0'. Other values will use different outputs, '/video1' or '/video2' and so on if you have multiple connected cameras. IP Webcam means using a mobile application called "IP Webcam" that starts a local server to transmit your mobile phone's camera feed to your computer. The IP will frequently change when you start the server. #### Step 5 - View Detected ArUco Poses You can run the following command to see the detected ArUco IDs and pose estimations right within your terminal, however the aruco\_tf2\_node must be running in parallel in a separate terminal. ```bash ros2 topic echo /tf ``` Alternatively, you can view the pose estimation with rviz. You can expect a simillar output: ```bash --- transforms: - header: stamp: sec: 1767899812 nanosec: 662838346 frame_id: camera_frame child_frame_id: aruco_11 transform: translation: x: -0.03687934682250437 y: -0.012666235570217378 z: 0.13659864132869448 rotation: x: -0.6982514505098149 y: 0.7123967508805725 z: -0.0574988868747503 w: 0.04036903768865494 --- ``` ### Camera CalibrationThe CharUco camera calibration cpp file somehow vanished during development. It must be reimplemented to obtain a better `charuco\_camera\_params.yml` file with more optimized parameters.
TODO: write this section once camera calibration works again. UPDATE: Was able to recover the file now just have to re-implement it. # YOLOThis section is under construction until we define more things for computer vision with YOLO.
# Path Planning # OverviewWork on this subsystem has not started yet
# Rover Communications # Overview Communication is a subsystem responsible for bridging the two distinct networks present on the rover: the Ethernet Network and the ROS2 Network. Without it, Jonny Boi (the Jetson Orin Nano) would have no way to talk to the hardware microcontrollers or the Basestation, and the internal ROS2 software stack would have no way to act on external inputs or send commands outward. On the Ethernet side, the Jetson connects to the hardware boards (ArmBoard, DriveBoard, SensorBoard, ContainerBoard) and to the Basestation over WiFi. On the ROS2 side, the Communications node exchanges messages with internal nodes such as the Behavior Node, which handles business logic, and the Controller Node, which manages hardware commands. All messages sent over the network, whether towards the Basestation or the hardware microcontrollers, are encoded as Protobuffers, wrapped inside a [PBEnvelope](https://bookstack.roboteamtwente.nl/books/jonny-boi/page/pbenvelope "PBEnvelope"). The PBEnvelope acts as a typed container that lets the receiver identify what kind of message it is receiving before deserializing the payload. These wrapped messages are transmitted as raw bytes inside UDP packets. The Communications node operates in both directions: - Inbound (Ethernet -> ROS2): UDP packets received from the Basestation or hardware boards are parsed, the protobuf payload is extracted from the PBEnvelope, and the data is converted into custom ROS2 messages before being published over the appropriate ROS2 topic for other nodes to consume. - Outbound (ROS2 -> Ethernet): The Communications node subscribes to relevant ROS2 topics, converts the incoming ROS2 messages back into Protobuffers, wraps them in a PBEnvelope, and transmits them as UDP packets to the intended destination, either the Basestation or a hardware board. Consider the Rover Architecture diagram [Rover Architecture diagram](https://bookstack.roboteamtwente.nl/books/jonny-boi/page/overview "Overview") to get a visual overview of how the Communications node sits at the center of these data flows. Before diving into the codebase, it is strongly recommended to read the [ROS2 documentation](https://docs.ros.org/en/humble/Releases.html), particularly the entries regarding topics, messages and publishers/subscribers: [https://docs.ros.org/en/humble/Concepts/Basic/About-Interfaces.html](https://docs.ros.org/en/humble/Concepts/Basic/About-Interfaces.html) You will also need background knowledge in C++ and UDP networking. The following guide is a solid starting point: [https://beej.us/guide/bgnet/html/split-wide/](https://beej.us/guide/bgnet/html/split-wide/) # UDP Forwarder and ROS2 Publisher ## `udp_forwarder_node.cpp` This is the main file running the communications logic on Jonny Boi's side. It is a ROS2 node that simultaneously acts as a UDP server and a ROS2 publisher/subscriber. Its primary responsibilities are: - Receiving raw encoded PBEnvelope packets over UDP from the Basestation or hardware microcontrollers - Deserializing the protobuf payload and converting it into a custom ROS2 message - Publishing that ROS2 message over the appropriate topic for internal nodes to consume - In the outbound direction, subscribing to ROS2 topics and converting messages back into protobufs to be sent as UDP packets ## The Handler Pattern The most important architectural concept in this file is the **registry-based handler dispatch system**. Rather than having a large switch statement that handles every possible message type, the node maintains an `unordered_map` that maps each `PBEnvelope::PayloadCase` enum value to a dedicated handler object. When a UDP packet arrives, the node parses it as a `PBEnvelope` and calls `payload_case()` to identify the message type. It then looks up the corresponding handler in the map and calls `handle(envelope)` on it. Each handler is a class that extends the abstract `Handler` base class and is solely responsible for one message type — deserializing the protobuf, mapping its fields to a ROS2 message, and publishing it on the correct topic. Registering a handler looks like this: ```cpp handlers_.emplace( static_cast| Parameter | Default | Description |
|---|---|---|
| `listen_port` | 5000 | UDP port the node listens on |
| `dst_a_port` | 6000 | First forwarding destination port |
| `dst_b_port` | 6001 | Second forwarding destination port |
| `dst_ip` | 127.0.0.1 | Destination IP for both forwarding targets |
This implementation will CHANGE SOON. to forward ONLY to appropriate destinations.
# Protobuffers ## What are Protobuffers? Protocol Buffers (Protobuffers or protobufs) are Google's binary serialization format for structured data. Compared to alternatives like JSON or XML, they are significantly more compact and faster to serialize/deserialize, making them well-suited for real-time communication between the rover's subsystems. They are also strongly typed and language-agnostic, the same `.proto` definition can generate code for C++, Python, Rust, and others. For a general introduction, refer to the official documentation: [https://protobuf.dev/overview/](https://protobuf.dev/overview/) ## The ERC-Protobufs Repository All protobuf definitions used by the rover live in a shared repository called **ERC-Protobufs**, which is used as a dependency across the rover's software stack. You can find it linked from the [Starting with Protobufs](https://bookstack.roboteamtwente.nl/books/communication-system/page/starting-with-protobufs "Starting with Protobufs") page. The repository is organized under a `components/` folder, where each subfolder groups messages by the hardware board or subsystem they belong to: ``` components/ arm_board/ driving_board/ sensor_board/ container_board/ basestation/ common/ ``` For example, `components/basestation/detected_object.proto` contains the message definition for a single YOLO-detected object sent from Jonny Boi to the Basestation. Placing it under `basestation/` makes its intended direction and purpose immediately clear. ## Naming Conventions Every message name in the repository must be **globally unique**, regardless of which folder it lives in. This is because proto3 imports reference files by path, but message names exist in a flat global namespace, two messages with the same name will cause build failures. The convention used across the rover is to prefix every message name with its component: - `ArmBoardControlSignals` - `BasestationControlMode` - `SensorBoardIMUInfo` - `DrivingBoardMotorMessage` Follow this convention strictly when adding new messages. ## How Protobufs are Compiled The `comms` package does not manually clone ERC-Protobufs. Instead, CMake fetches it automatically at build time using `FetchContent`, pinned to a specific commit hash in `CMakeLists.txt`: ```cmake FetchContent_Declare( erc_protobufs GIT_REPOSITORY https://github.com/RoboTeamTwente/ERC-Protobufs.git GIT_TAG| Field Number | Message Type | Direction |
|---|---|---|
| 1 | SensorBoardPHInfo | Hardware → ROS2 |
| 2 | ArmBoardControlSignals | ROS2 → Hardware |
| 3 | ArmBoardDiagnostics | Hardware → ROS2 |
| 4 | ArmBoardMovementFeedback | Hardware → ROS2 |
| 5 | ArmBoardActualPositions | Hardware → ROS2 |
| 6 | ArmBoardTargetMovement | ROS2 → Hardware |
| 7 | ArmBoardObstructions | Hardware → ROS2 |
| 8 | DrivingBoardDiagnostics | Hardware → ROS2 |
| 9 | DrivingBoardMotorMessage | ROS2 → Hardware |
| 10 | DrivingBoardMotorPeriodicProgress | Hardware → ROS2 |
| 11 | SensorBoardDiagnostics | Hardware → ROS2 |
| 12 | SensorBoardGPSInfo | Hardware → ROS2 |
| 13 | SensorBoardIMUInfo | Hardware → ROS2 |
| 14 | SensorBoardLoadCellInfo | Hardware → ROS2 |
| 15 | SensorBoardPressureInfo | Hardware → ROS2 |
| 16 | BasestationControlMode | BS → ROS2 |
| 17 | BasestationDetectedObject | ROS2 → BS |
| 18 | BasestationObjectSelection | BS → ROS2 |
| 19 | BasestationRockMeasureRequest | BS → ROS2 |
| 20 | BasestationRockMeasureResult | ROS2 → BS |
| 21 | BasestationRoverLocalization | ROS2 → BS |
TLDR: I don't remember what we were doing with this file.
The ERC-Protobufs repo contains a file called `message_types.proto` which defines a `PBMessageType` enum. This file is a leftover from an earlier architecture where a manual type ID system was planned. It is explicitly excluded from the build in `CMakeLists.txt` because its enum values collide with message names in the global proto3 namespace. It is unused, do not reference it or add new entries to it. ## Trailing Zero Bytes The `envelope.proto` file includes an important note: all PBEnvelopes sent over the network must have trailing zero bytes removed before transmission. Proto3 serializes unset fields as zero bytes, and stripping them reduces network traffic. The receiver must pad the received datagram back to the full PBEnvelope size before deserializing. This is handled by the protobuf library's `SerializeToString` and `ParseFromArray` functions when used correctly. ## Adding a New Message Type To add a new message type to the PBEnvelope, see the dedicated [Adding a new message](https://bookstack.roboteamtwente.nl/books/jonny-boi/page/adding-a-new-message "Adding a new message") page for the full step-by-step procedure. # Integration with ROS2 ## Overview The Communications node bridges the gap between raw UDP/protobuf packets and the ROS2 ecosystem running on Jonny Boi. This page explains how incoming protobuf messages get converted into ROS2 messages and published on topics, the handler pattern that makes this extensible, and how custom ROS2 message types are defined. ## Custom ROS2 Message Types ROS2 uses its own message format (`.msg` files) to define the structure of data exchanged between nodes over topics. These are separate from protobuf definitions, they exist so that internal ROS2 nodes like the Behavior Node can work with typed, idiomatic ROS2 messages rather than raw protobuf objects. All custom message definitions live in the `msg/` folder of the `comms` package: ``` comms/msg/ ImuSensorInformation.msg SensorBoardGPSInfo.msg SensorBoardPHInfo.msg SensorBoardDiagnostics.msg SensorState.msg ``` These are registered in `CMakeLists.txt` via `rosidl_generate_interfaces`, which generates the corresponding C++ types at build time. The generated types follow the naming convention `comms::msg::MessageName` and can be included in any C++ file as `#include "comms/msg/message_name.hpp"`. For more on ROS2 interfaces, refer to the official documentation: [https://docs.ros.org/en/humble/Concepts/Basic/About-Interfaces.html](https://docs.ros.org/en/humble/Concepts/Basic/About-Interfaces.html) ## The Handler Pattern The handler pattern is the core architectural decision that makes adding new message types straightforward without ever touching the dispatch logic in `udp_forwarder_node.cpp`. Every message type that needs to be converted and published as a ROS2 topic is represented by a handler class. All handlers extend the abstract `Handler` base class defined in `include/comms/udp/handler.hpp`: ```cpp class Handler { public: virtual ~Handler() = default; virtual void handle(const PBEnvelope& envelope) = 0; }; ``` Each concrete handler class — one per message type — lives in `include/comms/udp/handlers/` and its corresponding `.cpp` in `src/handlers/`. Its job is exactly three things: 1. Extract the specific protobuf message from the `PBEnvelope` 2. Map the protobuf fields to the equivalent ROS2 message fields 3. Publish the ROS2 message on the appropriate topic As an example, `ImuHandler` extracts `SensorBoardIMUInfo` from the envelope, maps its accelerometer, gyroscope and magnetometer fields to a `comms::msg::ImuSensorInformation` message, and publishes it on the `imu_data` topic. ## Handler Registration Handlers are registered in the constructor of `udp_forwarder_node.cpp` using a simple `unordered_map` keyed by `PBEnvelope::PayloadCase`: ```cpp handlers_.emplace( static_castThis subsystem is still in experimentation phase and WILL change.
The autonomous navigation of the rover is supported by the use of an **Intel RealSense D435i** depth camera. This sensor provides synchronized RGB, depth, and inertial measurements (IMU), which are essential for perception and mapping tasks. The software interface for the camera is provided through the **realsense-ros ROS2 wrapper** package [realsenseai/realsense-ros: ROS Wrapper for RealSense™ Cameras](https://github.com/realsenseai/realsense-ros), which enables integration of the camera with the ROS 2 ecosystem. This repository has been cloned into the workspace and is included as a package. Additionally, the **librealsense SDK** [realsenseai/librealsense: RealSense SDK](https://github.com/realsenseai/librealsense), which provides the low-level drivers and APIs for the camera—is also included as a separate package. The primary package responsible for SLAM (Simultaneous Localization and Mapping) and map generation is `rtt_slam`. Within this package, all required dependencies are declared in the `package.xml` file, ensuring proper integration with the rest of the ROS 2 system. The process takes the RGB and depth frames along with the IMU data and produces a voxel-based local costmap as the output, using Nav2's built-in Voxel Layer plugin. The Nav2 framework is utilized to produce the map and for autonomous navigation. To launch SLAM: ```bash ros2 launch rtt_slam slam_launch.yaml ``` The launch file starts: 1. Realsense camera drivers 2. RTAB-Map odometry and SLAM 3. IMU filtering 4. Navigation2 (Nav2) 5. Costmap Visualization utilities ### Launch File Documentation The launch files define and orchestrate all nodes and processes required for perception, SLAM, and data streaming. They ensure proper initialization order and parameter configuration. All four launch files are written in the ROS 2 YAML launch format (`.yaml`). #### 1. camera\_launch.yaml Responsible for starting the depth camera. The launch file: - Loads RealSense configuration from `config/camera_realsense.yaml` - Starts the RealSense camera driver Configuration: - Enables the gyroscope, accelerometer, IMU synchronization, and point cloud generation. - Aligns depth images to the RGB camera. - Reduces image resolution for improved stability and performance. #### 2. rtabmap\_launch.yaml Responsible for localization and map generation. The launch file: - Loads RTAB-Map configuration from `config/rtabmap.yaml` - Remaps camera RGB, depth, and camera info topics - Starts RGB-D odometry - Starts RTAB-Map SLAM - Starts the Madgwick IMU filter - Publishes a static transform between `base_link` and `camera_link` Configuration: - Uses synchronized RGB and depth images from the RealSense camera. - Uses filtered IMU orientation estimates for odometry. - Deletes any existing RTAB-Map database on startup. - Optionally launches the RTAB-Map visualization tool. #### 3. navigation\_launch.yaml Responsible for autonomous navigation and costmap generation. The launch file: - Loads navigation parameters from `config/navigation.yaml` - Starts the Nav2 navigation stack - Starts costmap visualization nodes Configuration: - Uses the RTAB-Map occupancy grid as the global map. - Uses a voxel-based local costmap generated from RealSense point clouds. - Enables obstacle marking and clearing. - Uses the DWB local planner for path following. #### 4. slam\_launch.yaml Responsible for launching the complete SLAM system. The launch file: - Launches `camera_launch.yaml` - Launches `rtabmap_launch.yaml` - Launches `navigation_launch.yaml` Configuration: - Combines perception, localization, mapping, and navigation into a single launch command. - Ensures all required subsystems are started together. #### #### Video Streaming to Basestation ``` ExecuteProcess( cmd=['/bin/bash', os.path.expanduser('~/stream.sh')], ) ``` A separate script (`stream.sh`) is executed to stream camera data to the base station. ### Streaming Script Documentation This script uses **GStreamer** to transmit video over UDP. **Paragraph Breakdown:** ``` rosimagesrc ros-topic="/camera/camera/color/image_raw" ``` Captures image directly from a ROS topic. ``` videoconvert ! video/x-raw,format=I420 ``` Converts image format for encoder compatibility ``` x264enc tune=zerolatency speed-preset=superfast ``` Encodes video using H.264 with low-latency settings ``` rtph264pay pt=96 ``` Packages encoded video into RTP packets ``` udpsink host=145.126.xx.XXX port=4500 ``` Sends the stream to the base station via UDP ### RViz2 RViz2 is used as the primary visualization interface for the rover system. It allows real-time monitoring of sensor data such as RGB images, depth maps, point clouds, and TF frames. Additionally, it provides tools to visualize occupancy grids and SLAM outputs, aiding in debugging and system validation. It is used to test the implementation of the mapping and the working of the camera.